Import users
The Import users wizard lets you create many users at once from a single file, instead of adding them one by one. You upload an Excel or CSV file, match its columns to the right user fields, review the data, and import it.
To open it, go to the Users section and click Import users in the header, at the top right next to Bulk delete, Export users, and Add user.

Clicking Import users opens a full-screen wizard with four steps, shown in the progress bar at the top:

Step 1: Import file
Section titled “Step 1: Import file”Upload the file that contains your users. Drag it onto the area labeled Drop files here or click to upload, or click the area to choose a file from your computer. The wizard accepts Excel and CSV files.
Use the Download the template in Excel link to get a correctly formatted file to fill in.

Step 2: Select fields
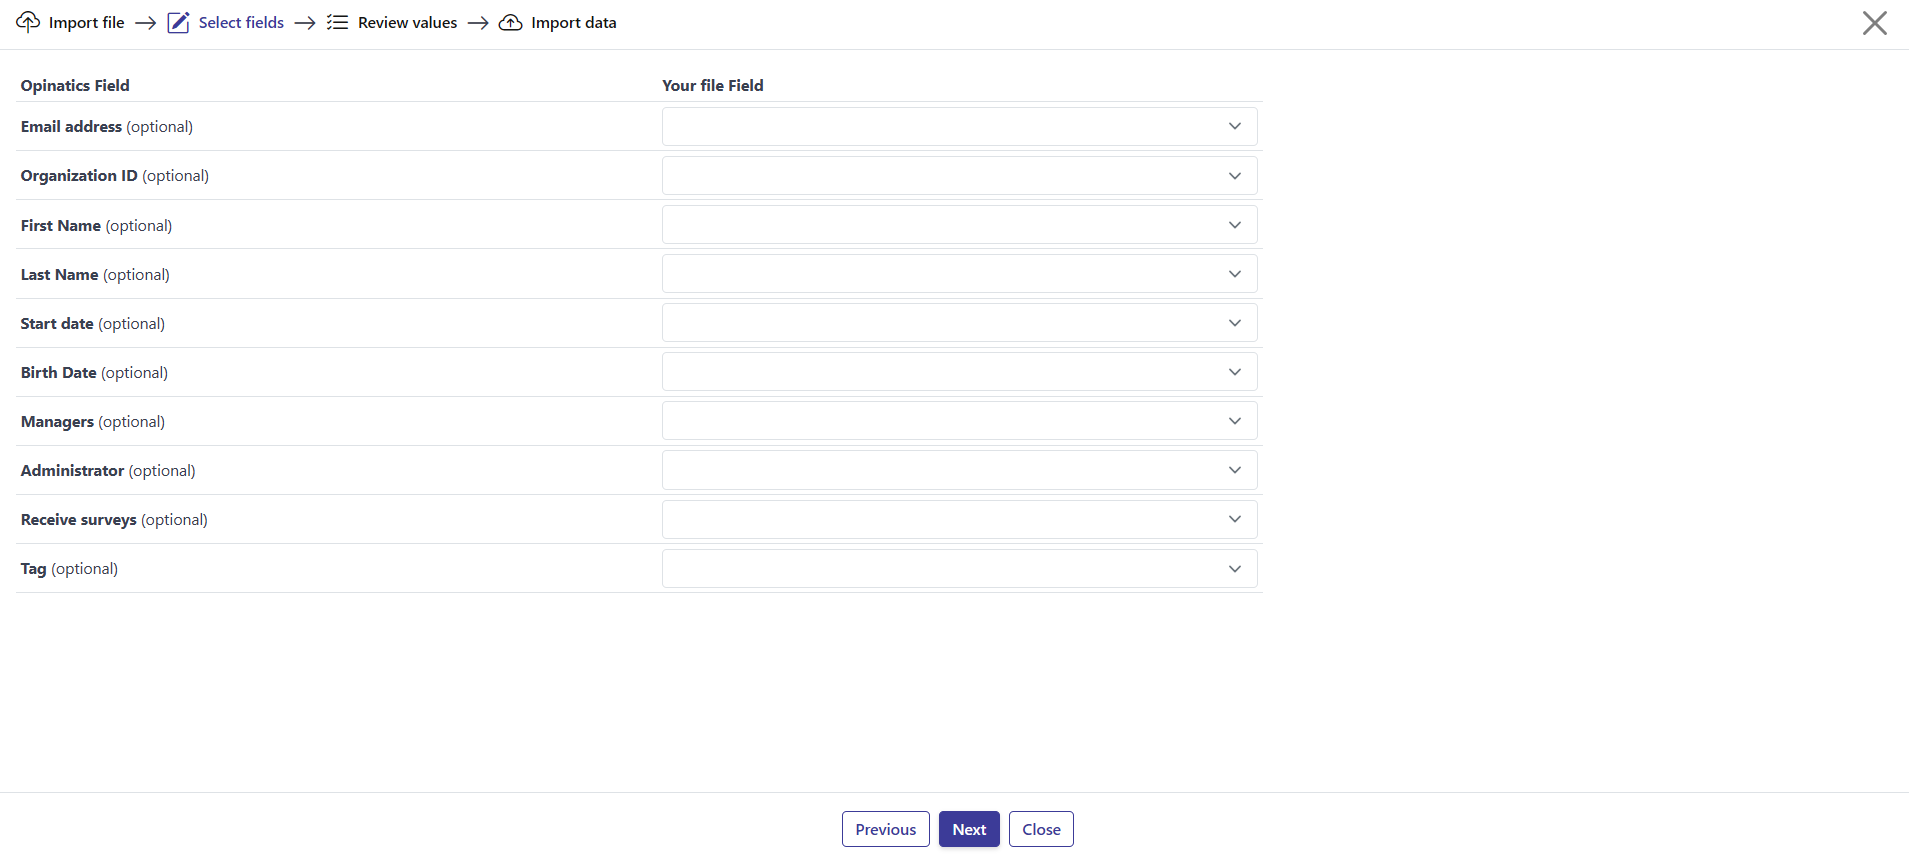
Section titled “Step 2: Select fields”After the file is uploaded, a two-column mapping table appears. The left column, Opinatics Field, lists the fields a user can have. The right column, Your file Field, has a dropdown for each one, listing the columns found in your uploaded file.
For each Opinatics Field, open the dropdown and pick the column from your file that should fill it. This is also where you can populate extra information beyond name and email — such as tags, managers, or permissions — from your file.
The fields you can map (all optional) are:
- Email address
- Organization ID
- First Name
- Last Name
- Start date
- Birth Date
- Managers
- Administrator
- Receive surveys
- Tag
The table also lists your organization’s Custom Fields, below the standard fields. Each one appears as its own row, marked (optional) — map a column from your file to it the same way you map a standard field, and its values are filled in during the import. If a custom field accepts multiple options, use its + Add [field name] column button to map more than one file column to that field.
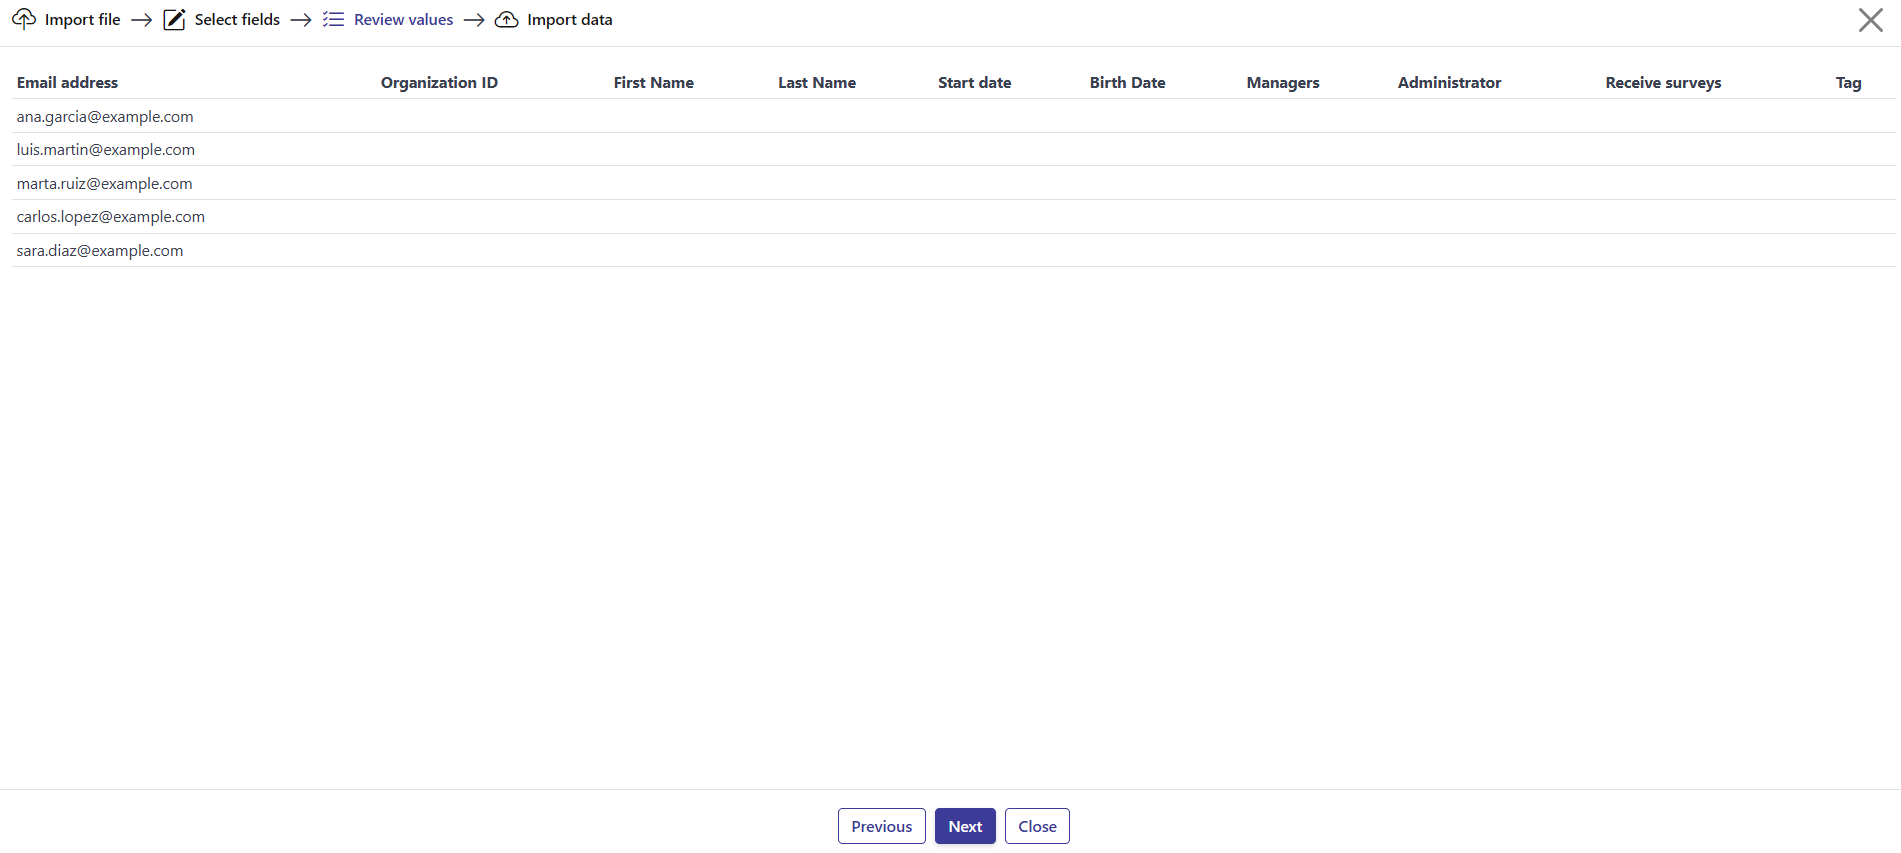
Step 3: Review values
Section titled “Step 3: Review values”A preview table shows your data, with one column per mapped Opinatics Field. Check that the values look correct before continuing. If something is wrong, go back and adjust the mapping or fix your file.
Step 4: Import data
Section titled “Step 4: Import data”The wizard runs a validation process, shown as a six-stage checklist:
- Check excel data
- Check user fields
- Check users data
- Add manager dependencies
- Check hierarchy errors
- Import Data
If every stage passes, your users are imported and you can close the window.
If there are problems, an error table appears instead, with two columns:
| Column | What it shows |
|---|---|
| User email | The user the error refers to. |
| Error | What went wrong (for example, Email address or Organization ID cannot be empty). |
While any errors remain, the import cannot continue. Fix the issues in your file and start the import again.

Moving through the wizard
Section titled “Moving through the wizard”Use Next to go to the following step and Previous to go back. Close exits the wizard, as does the X in the top-right corner.
Frequently asked questions
What file formats can I import?
Excel and CSV files.
What is the minimum required for each user?
Each user must have at least an Email address or an Organization ID, otherwise the row fails validation and the import cannot continue.
Is there a template I can use?
Yes. Use the Download the template in Excel link in step 1; its columns already match the fields Opinatics expects.
Can I import values for custom fields?
Yes. Every custom field defined for your organization appears as its own row in the field-mapping table in step 2, so you can map a column from your file to it.